Install A New Gas Tank: More Fuel. More Fun. We'll Show You How


What's more fun: Riding your dirt bike or stopping for gas? And in
a race, which one is faster? Riding, of course. So you need a
bigger dirt bike gas tank.
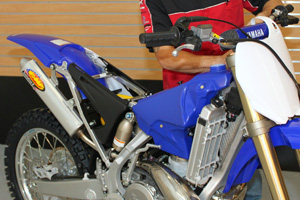
Our YZ250 - with a stock fuel tank - holds 2.1 gallons of fuel. For
motocross tracks, that might be okay; the fuel will likely outlast
your personal stamina. But for a trail ride? Or a weekend in the
desert? No. Worrying about running dry takes the fun out of a
ride.
We learned we could add 50% more fuel capacity to our ride by
installing an IMS Products oversized tank. This tank holds 3.2
gallons of fuel - that sounds like 50% more riding to me. These
tanks are designed for easy bolt-on installation. They're also
designed to feel - as much as possible - like the stock tank when
you're riding the bike.
Of course, most of these oversized fuel tanks are a bit taller than
your stock tank. Some of that extra gallon of gas (which weighs
about six pounds) will sit up a bit higher on your bike. Still, do
you want to ride more, or refuel? Read on.
IMS Products has been making high-performance parts for motorcycles
since 1976, equipping off-road racers with fuel tanks, footpegs and
more.
The tank for our YZ250 retails for about $275, and is available in
Yamaha Blue, a "Natural" off-white color, and the white we chose.
It's a clean look, and is mildly transparent, giving the rider a
visual cue of remaining fuel in the tank. Installation is quick and
easy with basic hand tools.
 1. Remove Stock Tank
Go for a ride until your tank is empty - not difficult to do,
right? You'll want the stock tank to be as empty as possible for
removal. After pulling off the plastic, the seat and fuel cap, we
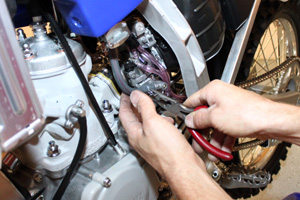
moved over to the fuel line at the petcock. We pulled the fuel line
from the carburetor knowing our tank was bone dry. If yours has a
splash of fuel inside, be prepared with a receptacle and some
clean-up rags.
The petcock and fuel line are connected to the stock tank, and
you'll re-use those parts on the new tank. Mounting brackets on the
stock tank secure it to the bike; you'll remove and re-use those
also on the new tank.
 2. Swap Tank Hardware
Before attaching hardware pieces to the new tank, make sure it is
completely clean inside. It should come clean from the
manufacturer, but why take chances? Anything inside will go right
into your bike's engine, so take a couple minutes and clean it.
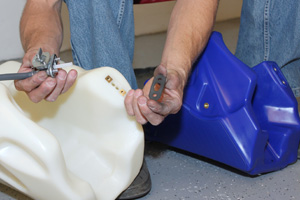
Remove the petcock from the stock tank; you get a new gasket with
the IMS tank, so don't worry about the stock gasket. The petcock
should be an easy swap, just make sure to use that new gasket. The
two mounting brackets are each secured with two bolts, and are
specific to left and right sides of the tank; note that when
removing these from the stock tank.
 3. Install New Tank
The new IMS tank - with existing tank hardware - is about the
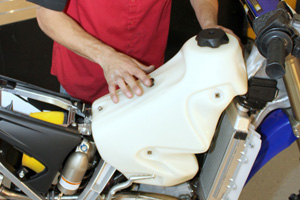
easiest product installation you'll encounter. Place the new tank
on the frame and secure it to the bike. To test the fit, install
the seat and climb aboard, making sure the new tank feels right.
Also turn the handlebars and make sure there is no
interference.
Before bolting on all the plastic pieces, hook up the fuel line to
the carb, then add some fuel to the tank and check for leaks. Check
it with the petcock in both the open and closed positions. Assuming
it's all good, you can replace all the plastic and get ready to
ride!
To see the this tech tip video on installing a new gas tank, click
here.
