Learn From The Pros: New Clutch & Brake Levers

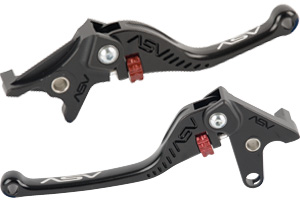
While your stock levers do the job, they're boring and fragile. Why
not choose better performance and great style? We chose a new set
of ASV
Inventions levers - brake and clutch - for our Honda
CBR600RR. ASV makes two styles of aluminum levers for sport
bikes: The [mageProductLink sku="crf330-g" title=""]Forged
F3[/mageProductLink] series we chose for our Honda ($90 per lever)
comes with a three-year guarantee; and the CNC-machined
[mageProductLink sku="brc510" title=""]C/5 series[/mageProductLink]
($116 per lever) has a five-year guarantee. They're made in
standard (stock) length, or in shorty versions at 1.25 inches less
than stock.
Why new levers? We like that the ASV levers are unbreakable, in
large part due to the component's unique pivoting design that folds
the lever out of the way upon impact - even a simple tip over.
Sealed steel bearings and a high-tension cantilever spring are
integral to the ASV pivot design; they also keep the levers from
inadvertently pivoting under normal riding.
Besides the purely functional appeal, the ASV levers also allow you
to easily adjust the reach to the levers, making these adaptable to
different riders, or even if you wear different gloves for warm or
cold weather.
Of course, the ASV levers also add a unique style to your bike.
Both the C/5 and the F3 levers are available in different colors.
We chose a black anodized finish for our CBR, but we could have
chosen the bright gold finish, too.
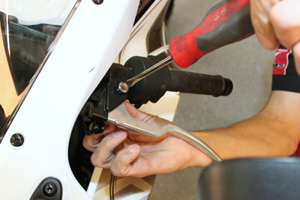 1. Remove Stock Lever
Installation process is similar on both sides of the bike, though
we're showing work on the clutch side. The two levers do, however,
have unique characteristics and components. We'll explain the
differences of each where necessary.
To remove either stock lever, you need a 10mm wrench plus a
straight-blade screwdriver to loosen and remove the main pivot
bolt. You'll reuse this pivot bolt with the new lever assembly.
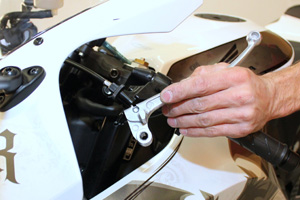 2. Disconnect Cable
Turn the cable adjuster all the way in to the clutch perch. This
will allow you to remove the cable wire from the adjustment housing
and pull the stock lever away from its mount as well. Remember to
retain that pivot bolt for installing the new lever.
Now you can simply detach the cable barrel from the underside of
the stock lever.
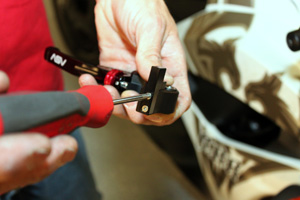 3. New Lever Assembly
Your ASV levers - both brake and clutch - include a variety of
small components to meet your brand of motorcycle's specific needs.
On the clutch side, you'll choose and install the correct parts to
activate your bike's neutral kill switch. Keep the parts you don't
use; if you buy a Suzuki sportbike next year, for example, you can
still use this ASV lever set, but you'll need the unique components
to activate the clutch kill switch and the brake light switch
(pictured). When installing these small components, use a
thread-locking adhesive to make sure they remain secure.
On the brake-lever side, you'll also need to use the supplied new
plunger barrel - it's difficult to remove the barrel from the stock
lever. And on the clutch side, you'll need a new main pivot-bolt
bushing. Choose the correct bushing for your brand of bike; ASV
includes a few to choose from, and each will press in using just
your fingers.
 4. Install New
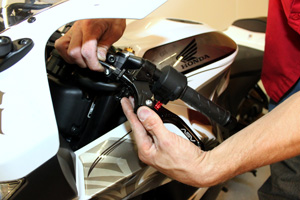
With the new lever completely assembled, installation is simple,
reversing the steps when you removed the stock lever. Insert the
clutch cable barrel into the underside of the new ASV lever, then
slide the lever into the clutch-lever housing so you can drop in
the original main pivot bolt. For both the clutch and brake side,
tighten these main pivot bolts until secure, but know that
over-tightening can pinch the lever in the bracket and impede lever
travel.
 5. Finished: Check
Controls, Set Adjustments
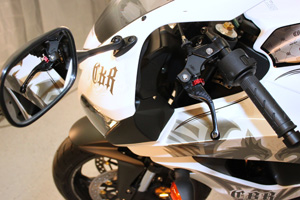
With installation complete, you need to ensure that all brake and
clutch lever controls function as designed. Answer several
questions. Does each lever operate smoothly without binding? Does
the brake light come on when the brake lever is applied? On the
clutch side, does the neutral kill switch work as it should? Your
bike should start only when it's in neutral, or when the clutch
lever is fully engaged. It should NOT start in gear unless the
clutch is pulled in.
Using the handy adjustment wheel, you can dial in the fit of the
levers as you like. And now you're ready to ride!
Installation
The installation is relatively quick and easy, but you need to take
care with each step to maintain optimum clutch and brake function.
Do this wrong, and somebody - probably you! - gets hurt.
